| 1. Put your cursor at the end of the text before your Table of Contents (usually the Dedication page). |
|
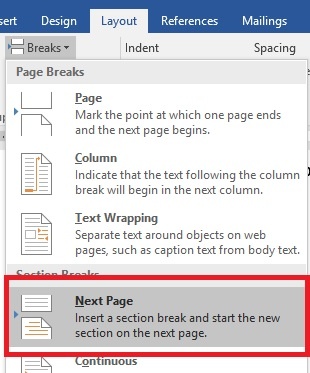
| 2. Go to the Insert menu and hover over Breaks. Choose "Section Break (Next Page)". | |
3. Repeat adding these section breaks to the page before each of the following locations: - Table of Contents
- Introduction
- Each chapter
- Conclusion (if you have one)
- Bibliography/Works Cited
- Vita (if required)
|
| Note |
|---|
Note: Please avoid using a Continuous section break; only use the Next Page section break. |
|
| 4. Return to your Table of Contents page. |
|
| 5. Double click in the Header. | |
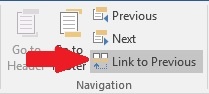
| 6. In the Header & Footer tab, click Link to Previous to turn off the link. | |
| 7. Put your cursor in the Footer on the Table of Contents page and again click Link to Previous to turn off the link. |
| Tip |
|---|
Tip: You can use the Go to Footer button in the ribbon to jump down to the Footer. |
|
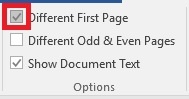
| 8. Put your cursor in the Header on the first page of the introduction/first chapter. Check the Different First Page box in the ribbon. Click Link to Previous to turn off the link. The note on your Header will now read "First Page Header -Section 3-". | |
| 9. Put your cursor in the footer on this page and again click Link to Previous to turn off the link. The note on your Footer will now read "First Page Footer -Section 3-". |
| Tip |
|---|
Tip: You can use the Go to Footer button in the ribbon to jump down to the Footer. |
|
| 10. Put your cursor in the Header on the next page of this chapter. Click Link to Previous to turn off the link. Move down to the Footer and click Link to Previous to turn off the link. |
| Tip |
|---|
Tip: You can use the Next button in the Navigation group to jump down to the next header. The cursor will go from the first page header in a chapter to the second page in that chapter (after Different First Page is turned on) to the next section (or chapter). |
|
| 11. Put your cursor in the Header on the first page of your next chapter. Check the Different First Page box in the Options group on your Design tab. | **Note: You do NOT need to turn off the link between your introduction, chapters, and bibliography.** These sections all have the same formatting. |
| 12. Repeat this step in the Header on the first page of each chapter and your bibliography/works cited. |
|
| 13. If you have a Vita, turn off the Link to Previous option in both the Header and the Footer. | There is no need to set Different First Page on your one-page Vita. |
| 14. Save your file. You've done a lot of work!! | |
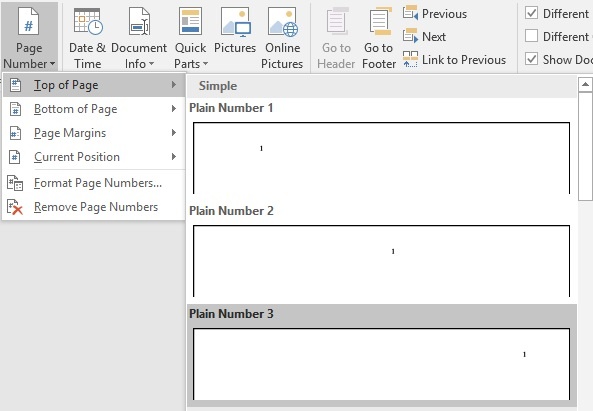
| 15. Put your cursor in the Footer of your Table of Contents (Section 2). Click Page Number in the Header & Footer ribbon, then choose Page Number. | |
16. Change the Alignment to Center. Click the Format button. | |
17. Change the Number format option to lowercase Roman numerals (i, ii, iii, ...). Make sure Page numbering is still set to "Continue from previous section". Click OK. Click OK again. | |
| 18. Put your cursor in the First Page Footer of Section 3 (the first page of your introduction/first chapter). Click Page Number in the Header & Footer ribbon, then choose Page Number. | |
19. Change the Alignment to Center. Click the Format button. | 
| Note |
|---|
| | Note: DO NOT check the "Show page number on first page" box. |
|
| 20. Change the Number format option to Arabic numerals (1, 2, 3, ...). Change Page numbering to "Start at:". If 1 is not filled in automatically, change the field to read 1. Click OK. Click OK again. | |
| 21. Put your cursor in the Header of Section 3 (the second page of your introduction). Click Page Number in the Header & Footer ribbon, then choose Page Number. Leave the alignment set to Right and click OK. | |
22. If you left the links turned on between your chapters, you should be able to check the remaining pages in the body of your text and find the page numbers counting up, moving to the bottom center on the first page of each chapter, remaining top right for all other pages. If the number on the first page of a subsequent chapter changes to 1: - Click Page Number in the Header & Footer ribbon, then choose Format Page Numbers...
- Leave the Number format: option at 1, 2, 3, ...
- Change the Page numbering option to "Continue from previous section".
- Click OK.
| |
| 23. If you have a Vita, double check that there are no page numbers in the header or footer. If there are, make sure the Link to Previous option is turned off (not on a darker grey background than the rest of the options in the menu). If you turn that off and the numbers are still there, simply put your cursor in front of the number and hit Delete twice. |
|
| 24. Save again. You're done!!! | |