| Excerpt |
|---|
The following instructions require you to have the printer queue name for the Offset printer. You can get this from someone else in the department that uses the printer. The name will include the location, department and model of the printer. The model number is not the queue name.
You will also need to be an administrator on the computer in order to add a printer.
Enabling CUPS Printer Interface for Mac - CUPS is a network printing service used by Mac computers. It allows you to setup your printers on a network.
For Macintosh computers joined to the Drew domain:
For Macintosh computers not joined to the Drew domain:
| Expand |
|---|
These steps will work on a Mac that is not joined to the Drew domain. You can use either a wired connection or a Drew wireless connection.
Open System PreferencesClick on Print & Scan.
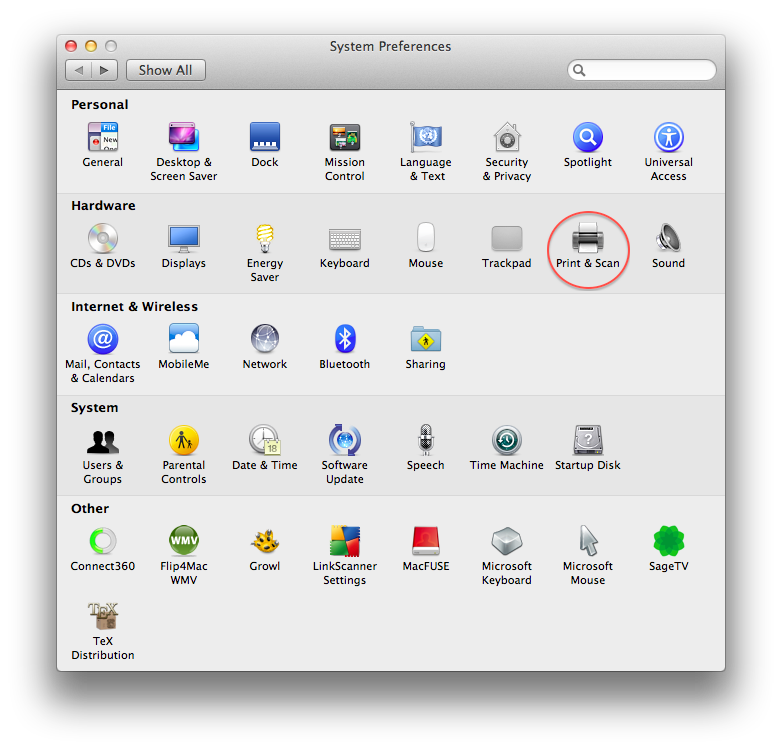 Image RemovedClick the (+) on the bottom left to add a printer.
 Image RemovedA new window will appear. Right click the toolbar at the top of the window. Select Customize Toolbar...
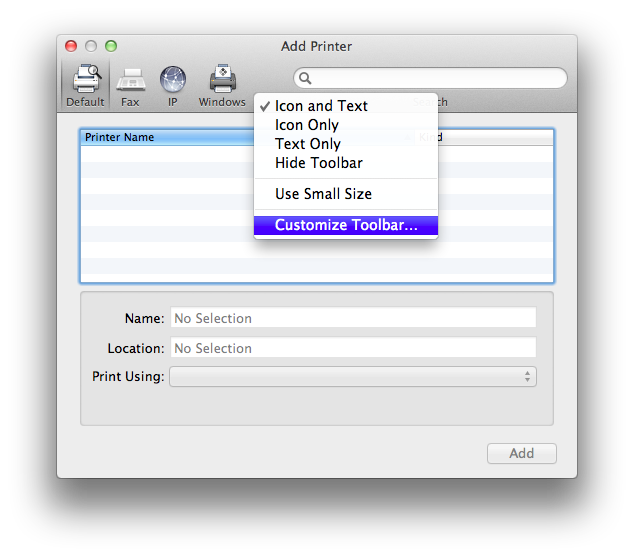 Image RemovedDrag the "Advanced" icon into the toolbar to the right of the Windows icon. Click Done. Now click Advanced.
 Image RemovedFrom the Type drop-down menu, select Windows printer via spoolss.
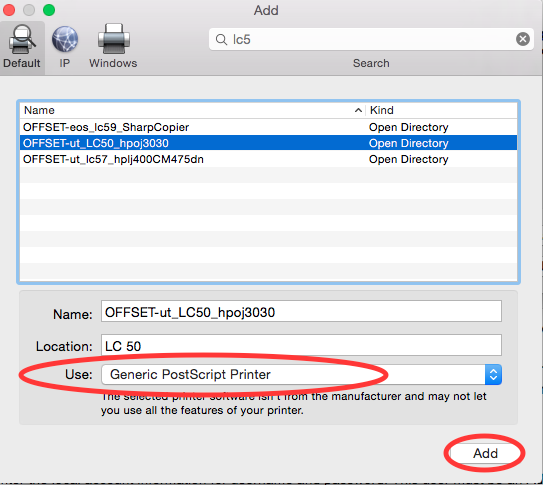
 Image RemovedUsing the following format enter smb://offset.drew.lan/<PRINTERNAME>, replacing <PRINTERNAME> with the printer's queue name, then click Continue.
 Image RemovedFill in the Name and Location fields with what you would like.
 Image RemovedUnder the Print Using drop-down menu, click on Generic PostScript Printer.After the correct software is selected, click Okay and then Add and then Okay.You should have the printer correctly installed now.
Since this is a network printer, you will have to provide uLogin credentials (your Drew username and password) before you are able to print.
You can enter your uLogin credentials and click Remember this password in my keychain so you don't have to type it every time you print. Just keep this in mind when you change your password.
Alternative Instructions | Excerpt |
|---|
Space in the queue name?Queue names should NOT have any spaces, but if they do, replace the space in the name with "%20" (without quotation marks).
Before installing Sharp Copiers (This is required to use "finishing" options like hole punching and stapling) - Go to www.sharpusa.com
- Click Support at the top and Product Downloads under Business Products Support?
- Choose MFPs under Product Category
- Select the model number of the Sharp Copier under Product
- Change File Type to Drivers and Utilities
- Click Search
- Download the Mac OS Driver Package Software (make sure the Mac's OS is listed for compatibility)
- Run the file downloaded and install the software for the appropriate Mac OS version
- The Sharp driver will be available to select when choosing a driver in the steps below
Enabling CUPS Printer Interface for Mac - CUPS is a network printing service used by Mac computers. It allows you to setup your printers on a network. For all Macs (not dependent on Drew domain)| Expand |
|---|
These steps can be done on any Mac, even if it is not joined to the Drew domain. You can use either a wired connection or a Drew wireless connection. - Open Terminal (you can use the spotlight search)
- Type "cupsctl WebInterface=yes" and hit Enter
- Enter administrator's username and password if prompted
- Open the CUPS interface by going to http://localhost:631/ in a browser
|
|
...
- Click on the Administration tab along the top.
- Under Printers, click the Add Printer button.
- If prompted, enter the local account information for username and password. This user must be an Administrator. (This is your Mac username and password)
- Scroll to the bottom and choose "Windows printer via spoolss", and click Continue.
- In the Connection field, enter smb://offset.drew.lan/
|
|
...
...
- PRINTERNAME with the printer's
|
|
...
- shared queue name, then click Continue.
- Fill in a name for this printer in the Name field, such as "HelpdeskBW" or "HPLaserJetRoomBC8." You cannot use spaces, slashes (/ or \) or the pound sign(#). If you cannot think of one, the printer queue name will work. Click Continue.
- If you fill in a name that isn't accepted, you will see an "Add Printer <entered name> Error" with an explanation. Use the back button and try a new name.
- Description and Location can be left blank. "Share This Printer" does not need to be checked. Click Continue.
- In the "Make" list, choose the brand of printer. If you do not have the proper driver, or you do not know if you have the proper driver, choose "Generic." Click Continue
- In the "Model" list, choose the specific model of your printer, or the suggested driver model on your printer's manufacturer's website. If you chose "Generic," choose Generic PostScript Printer
- Click Add Printer. On the next page, you can either change the default options on your printer (such as enabling Duplex), or just click Set Default Options.
- You will see a confirmation page about the printer settings, and will then be taken to a status page for the installed printer (on the Printers tab).
The printer is installed. Since it is a network printer, you will have to provide uLogin credentials before you are able to print: - Click System Preferences
- Click Printers & Scanners
- The printer you just added will be listed under Printers on the left. Double click it.
- In the menu at the top of the screen, click Printer
- Click Print Test Page
- The print job will pause. In the window that opened for the printer, you will see "testprint" and it will say "Hold for Authentication". Click that job name.
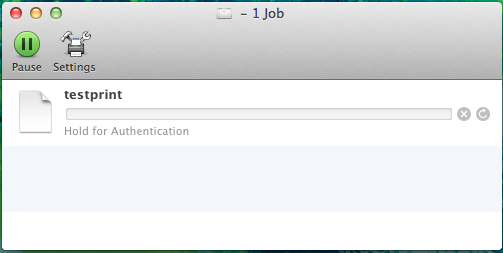 Image Modified Image Modified - Click the Jobs menu, then Resume Job
- Enter your uLogin credentials and click Remember this password in my keychain so you don't have to type it every time you print
- Click OK and the job will print
The printer is installed and ready to use. |
For Macintosh computers joined to the Drew domain: For Macintosh computers not joined to the Drew domain:
|