The following instructions require you to have the printer queue name for the network printer. You can get this from someone else in the department that uses the printer (and sometimes you will find the name on the printer itself). The name will include the location, department and model of the printer. The model number is not the queue name. If you cannot get the queue name, please provide us with the model name and location of the printer, as well as what department the printer was set up for. This information can be provided in an existing ticket, by emailing helpdesk@drew.edu, or by calling 973-408-4357 during open hours. Printer Installation, Option 1You will need to be logged in as an administrator to install a printer. Reach out to the Helpdesk if you are not an administrator. Also, your computer should be plugged in to a network cable or on the drew1x wireless network. - Go to the Start menu
 Image Added, then type "\\offset.drew.lan" and hit Enter. Image Added, then type "\\offset.drew.lan" and hit Enter.
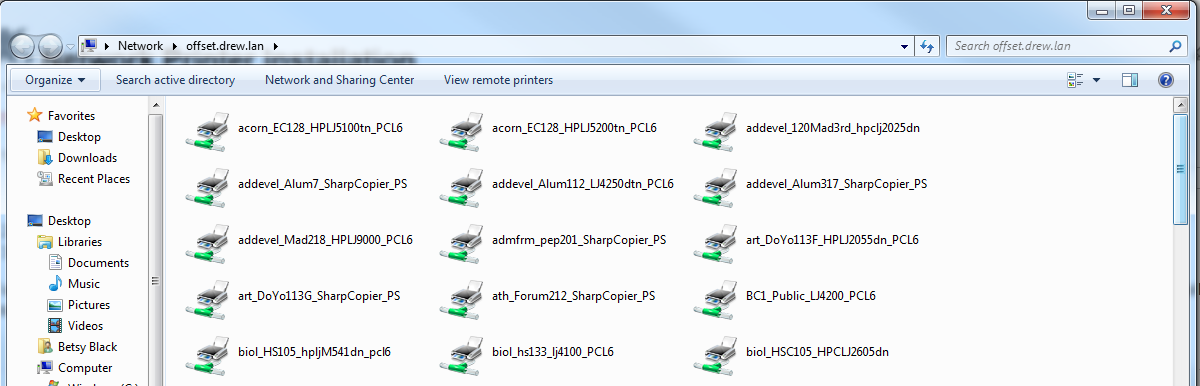
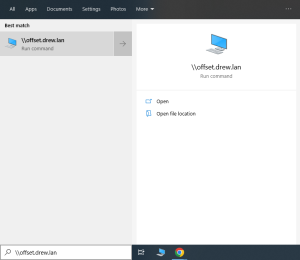 Image Added Image Added If prompted for a username and password, type "DREW-AD\username" (replacing "username" with your username) and your password. - Locate the printer using the provided queue name. Double-click the printer icon to automatically install drivers (approving Windows prompts as necessary) and set up the printer.
Faculty and Staff should automatically see relevant printers in their department. If you cannot see the printer you wish to install, please email helpdesk@drew.edu with the name of your department and the location of the printer. Printer Installation, Option 2| Expand |
|---|
You will need to be logged in as an administrator to install a printer. Reach out to the Helpdesk if you are not an administrator. Also, your computer should be plugged in to a network cable or on the drew1x wireless network. - Open the Start menu
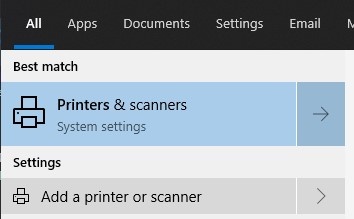
- Type "printers" and select Printers & scanners
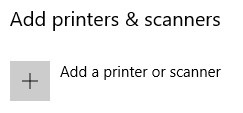
 - Click "Add a printer or scanner"
 - After the computer searches for printers, look through the list and click the name of the printer you intend to use.
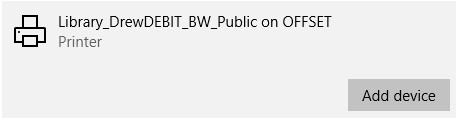 - Click Add device
If prompted for a username and password, type "DREW-AD\username" (replacing "username" with your username) and your password. - Once installed, you will see the printer name with the word "Ready"

Faculty and Staff should automatically see relevant printers in their department. If you cannot see the printer you wish to install, please email helpdesk@drew.edu with the name of your department and the location of the printer. |
Finding Printer Drivers | Expand |
|---|
Sometimes drivers must be loaded directly from the M: drive. If you have selected Connect to this printer, and still receive the following error message: | Info |
|---|
The server for the printer does not have the correct printer driver installed. If you want to search for the proper driver, click OK. Otherwise, click Cancel and contact your network administrator or original equipment manufacturer for the correct printer driver. |
Click OK, which will bring up a new window. Click Have Disk. You will need to locate the model-specific printer drivers on the M: drive, so navigate to the M:\Drivers\PRINTER directory and find the folder containing the model in question. Inside, after a quick search, you should find a set of Operating System specific folders. |
Adding a Sharp Copier on the Drew NetworkYou should be on the drew1x wireless network if trying to connect wirelessly. - Go to the Start menu, then type \\offset.drew.lan
- Hit Enter
- If prompted for a username and password, type "DREW-AD\username" (replacing "username" with your username) and your password.
- Locate the printer using the provided queue name. Double-click the printer icon to automatically install drivers and set up the printer.
Faculty and Staff should automatically see relevant printers in their department. If you cannot see the printer you wish to install, please email helpdesk@drew.edu with the name of your department and the make, model and location of the printer. |