Perhaps you worked out a complicated math or chemistry equation on paper and need to share it with your professor. Perhaps you signed a printed document and need to retain a copy for your own records. In these situations and more, your phone can be an excellent tool for capturing and sharing the work.
There are many free apps available to use on your mobile phone. Of course, there are paid perks available for each of the free apps you will find, and you should also think about the security of the materials you scan and where you save them.
We include instructions for the CamScanner app (Android, iOS) and the Notes app (iOS only) below. Other popular free options include Genius Scan, Adobe Scan, or Office Lens.
CamScanner App
Free Trial Membership
Please note: New users of the CamScanner app will be signed up for a free premium trial version (currently lasting one month). After that month, your account will switch to the basic membership, which is free. See pricing models here. You are not required to pay for the license or subscription in order to continue using the app.
First time use
- Open the app.
- The first time you launch, you'll be walked through an intro.
- On the last step of the intro on an iOS device, it tells you payment will be charged to your iTunes account and cancel anytime. Instead of clicking Continue, click the X in the top left corner (unless you do want to sign up for the subscription, in which case, Continue!).
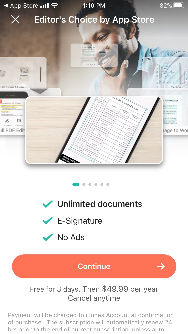
- On the last step of the intro on an iOS device, it tells you payment will be charged to your iTunes account and cancel anytime. Instead of clicking Continue, click the X in the top left corner (unless you do want to sign up for the subscription, in which case, Continue!).
- You have a choice to Register or "Use Now" (the latter being in smaller print)
- If you choose Use Now and are still prompted for a phone number or email address you do not wish to provide, hit the back button
- We recommend you choose "Don't Allow" for Notifications (you don't need extra notifications, do you?)
The app will encourage you to try the premium upgrade when you open it, and sometimes after scanning - choose "No Thanks"
Scanning Steps
- Open the app.
- Press the camera to start a scan.

Point your phone’s camera at the document you want. Press the Camera button.
Drag the edges or corners to crop the photo if necessary, then press Next.

Adjust your scan
Rename file (optional, but recommended)
Use options at the bottom to get the best visual - Magic Color often works best for a white background page.
Click the Save checkmark.

You can add pages by clicking the Camera button again.
- Once finished, share your file using either the PDF icon or the share icon (to the left and right of the red a in image below).

- If you want a PDF, choose PDF and go to step 8.
- If you want a JPG, choose Share and go to step 9.
- If you want one of the other file formats, you will see the options (and any potentially associated costs) by choosing the Share icon.
- After you see your PDF (with watermark), click the Share button at the top right. Go to step 10.

- Choose Share JPG (JPGs will also have a watermark). Go to step 10.

- Choose the service you wish to use for sharing. The options you have will depend on what other apps are installed on your device. You will probably opt to use Gmail or Save to Drive in order to share your file.

- We recommend sharing the file to your Drew Google Drive or Gmail account, then saving it to your computer and uploading it to Moodle, if that is the desired final destination.
- You've now scanned and shared your work! Congratulations!
Notes App (iOS Devices)
How-To Geek published a useful article on How to Scan Documents with the iPhone's Notes App. If you have an iPhone (or iPad), those step-by-step directions (with pictures) are a great reference.