...
The most important habit of all is backing up your thesis or dissertation as you write.
Back up your files in multiple places. This means storing a copy on the hard drive of your computer, on your Drew Network F: drive, on a "cloud" drive, and on an external piece of hardware such as a USB Flash drive or external hard drive. When you have saved changes to your thesis, save the changed document to all of the backup locations with the same name. It is extra work to create the backups, but it will save you a great deal of time should one file get lost or corrupted!
...
Directions for using Google Drive
A An additional non-Drew method for backing up your documents and accessing them anywhere is the website Dropbox. Dropbox is a free service that lets you bring your photos, documents, and videos anywhere and share them easily. This is done by syncing work to the site's cloud drive allowing for easy access across multiple devices (mobile, web, and desktop).
We recommend having at least 3 copies of your work. Use the storage solutions that you are most comfortable with, and remember to update the file(s) in each location at the end of each day's work.
Starting to Write
Outlined below are instructions for formatting your document. If you would prefer to use a template with many of these formatting styles programmed and ready to use, please see Drew Dissertation Templates and Using Microsoft Word Templates.
...
Specific Formatting Challenges
| Expand | ||||||||||||||||||||||||||||
|---|---|---|---|---|---|---|---|---|---|---|---|---|---|---|---|---|---|---|---|---|---|---|---|---|---|---|---|---|
Paragraph MarksParagraph marks can be helpful to see when something is not responding to formatting the way you expect it to. These can be turned on and off by clicking the paragraph marks symbol, Text
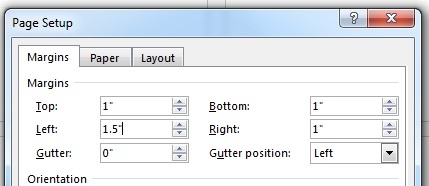
Page Margins
Title Page
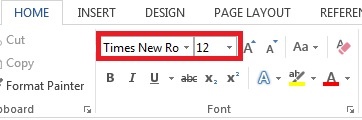
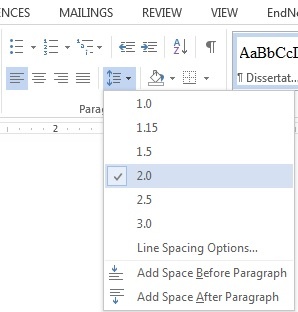
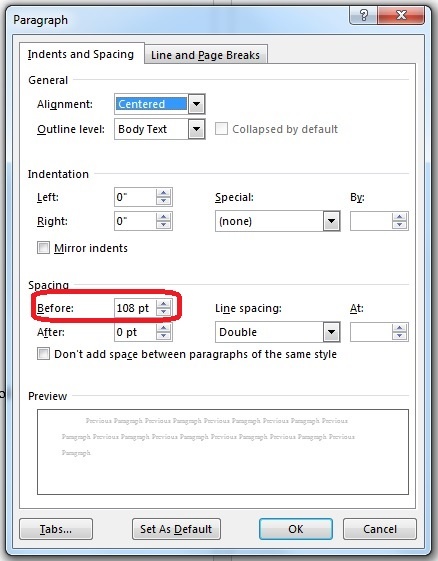
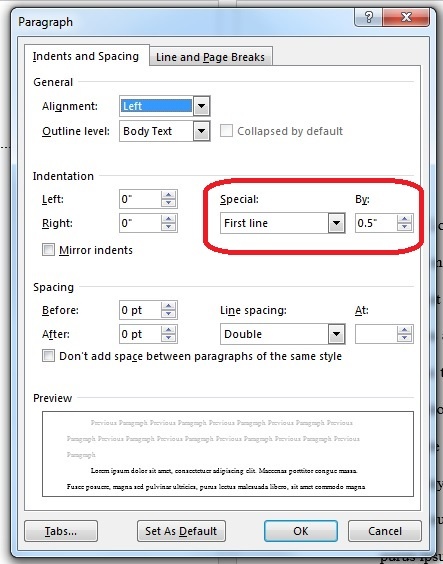
Body Paragraphs
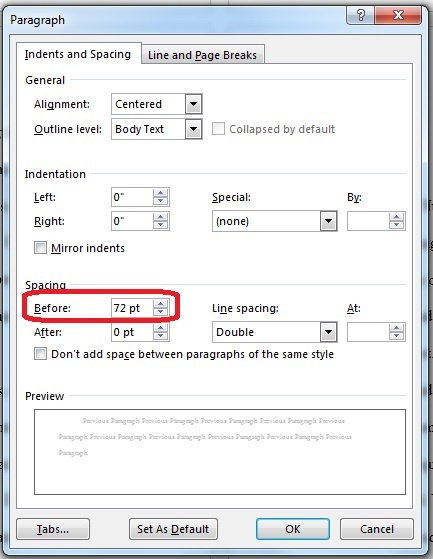
Chapter Titles
Adding Section Breaks (for page numbering and footnotes)
Footnotes
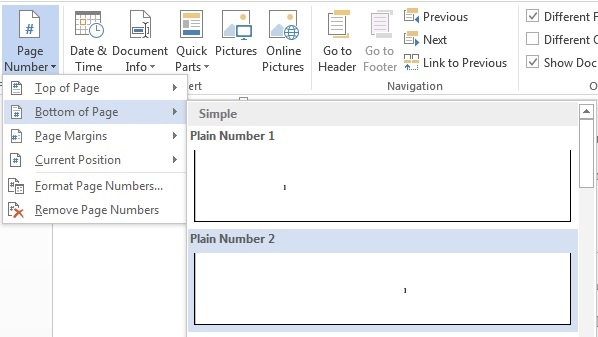
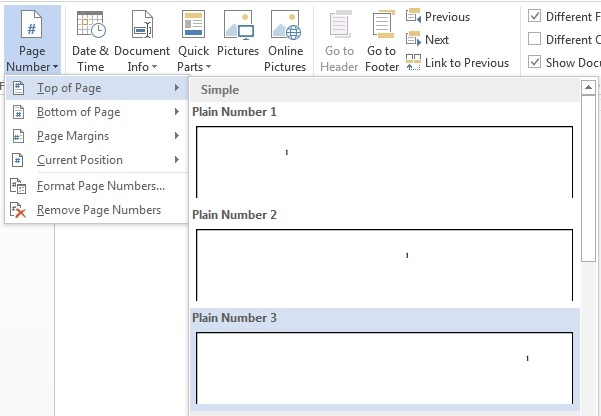
Page Numbering
Table of Contents
|


Page Numbering
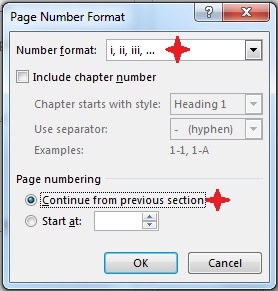
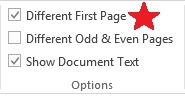
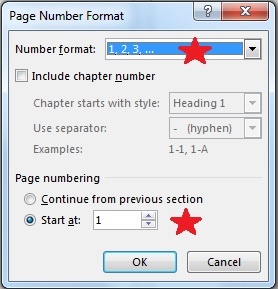
Word has built-in functionality that allows you to create a "different first page", so that you can have a page number bottom center on the first page and top right on the following pages.
Having a different first page in each chapter can be done either by saving different files for each chapter, or by using section breaks. Please contact the University Technology Service Center at 973-408-4357 with any questions about these options.
Microsoft provides the following information on page numbers:
- Word 2007: Start page numbering on page 2 http://office.microsoft.com/en-us/word-help/start-page-numbering-on-page-2-HP001227657.aspx?CTT=1
- Word 2010: http://office.microsoft.com/en-us/word-help/add-or-remove-headers-footers-and-page-numbers-HA010372690.aspx?CTT=1
- If you use different sections in a single document, this page may be useful: http://office.microsoft.com/en-us/word-help/number-pages-differently-in-different-sections-HA101832542.aspx?CTT=1
- Word 2011: http://office.microsoft.com/en-us/mac-word-help/add-or-remove-page-numbers-HA102928583.aspx?CTT=1
- Word 2013: http://office.microsoft.com/en-us/word-help/add-page-numbers-HA102809692.aspx?CTT=1
Table of Contents
Word has a feature which will use heading styles from your document to automatically create a Table of Contents.
The instructions below are written assuming you are using one of our dissertation templates. We recommend you use the Chapter Title style for each chapter, to ensure proper formatting. You can then tell Word to look for that style when identifying what should be included in your Table of Contents.
- Place your cursor where you would like your Table of Contents to appear
- Click on the References tab
- Click Table of Contents
- Click Insert Table of Contents... (near the bottom of the menu)
- Click the Options... button
- In the list of Available Styles, find Chapter Title and type a 1 in the box to the right (under TOC level)
- Click OK
- Click OK again
If you are not using our templates, but are using Heading styles to mark your chapter titles, you can refer to the following information from Microsoft Office support to generate a Table of Contents.
Self-paced courses:
- Word 2007: http://office.microsoft.com/en-us/word-help/table-of-contents-i-create-an-automatic-toc-RZ010261698.aspx?CTT=1
- Word 2010: http://office.microsoft.com/en-us/word-help/create-and-customize-a-table-of-contents-RZ102634105.aspx?CTT=1
- Word 2013: http://office.microsoft.com/en-us/word-help/video-introduction-to-tables-of-contents-VA104034697.aspx?CTT=5
Articles:
...
Table of Contents
|
Microsoft Office Support
| Expand |
|---|
Page numbers
Table of ContentsWord has a feature which will use heading styles from your document to automatically create a Table of Contents. Self-paced courses:
Articles:
|
...
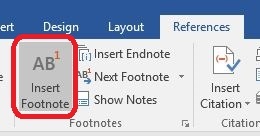
FootnotesYou can watch videos or download entire courses about working with footnotes in Word here:
|
...
|
...
...
Articles with instructions can be found at the following links |
...
- These instructions also apply to Word 2007
...
:
|
...
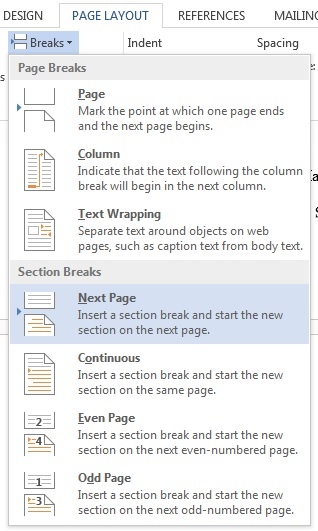
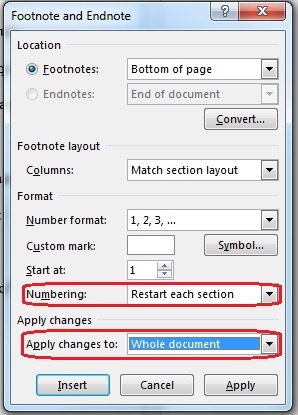
Section BreaksIf you are saving your entire thesis or dissertation as one document, you will need to use section |
...
breaks to allow you to format the first page |
...
of each chapter properly. Information about this feature can be found at the following links:
|
...
|
...
Note: You will want to use "Next Page" section breaks between chapters |
...
. You can follow the instructions at Number pages differently in different sections to number the pages for each section of the document. Remember to use the "different first page" option! BibliographyThe following information may be helpful when you are ready to create your |
...
bibliography:
|
...
|
...
Using PDF-XChange Editor
PDF-XChange Editor is a software that allows you to work with PDF files. For your purposes here, you can use it to pull certain pages out of a larger PDF file to share with your adviser, or you can use it to merge multiple PDF files into one file for submission.
...
- Use the template provided, with built-in styles
- Be cautious copying and pasting text in Word, even from one Word document to another
- Watch your white space: What you see as empty Word may see as information
- To start a new page, use the Insert>Blank Page option (or CTRL+ENTER on the keyboard) rather than simply hitting Enter until you reach the page you want
- Remember to save constantly as you work, and to save copies of the updated file(s) to all of your backup locations after each time of working on your document
- Don't worry about page numbers until you are mostly finished writing
- You can use PDF-XChange Editor, found in the Office Applications folder in CloudPC, to combine multiple PDF files into one PDF document (see "Using PDF-XChange Editor", above)
- If you feel more comfortable hiring someone to do the formatting for you, consider hiring a professional editor. A Google search for "professional editor" and your location should yield a few options.
...