...
To find a particular reference,
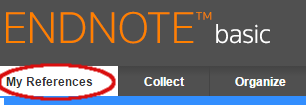
Go into the My References tab 
Make sure the left panel is open (if "Show Panel" is displayed, click on it), and type the Type the term you wish to search for in the box under "Quick Search", then click the search button.:
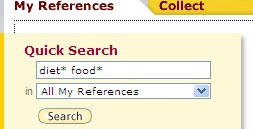
Note that if you enter use multiple words in the search box, Quick Search will simply display all the records with ANY of your search terms. To search for a specific phrase, enclose the phrase in quotation marks. Boolean searching (with AND, OR, NOT etc.) is not supported but you can truncate terms of 3 or more characters with an asterisk: diet* for diet, diets, dietary, dietetic, etc..
...
Filing Your References into Groups
For ease of use, you'll probably want to group your references by subject or project. These groups can also be used to To share your results with other people your instructor, or to print them, using Endnote Basic, you'll have to define them as a named group. To do this,
- In either a search or a folder (such as "Unfiled") select the references you want to group by clicking the checkboxes next to them.


- At the top of your list of references you'll see a drop-down menu that says "Add to Group". If you already have a group to add them to, you can select it from that menu:

...
- ." To create a new group to add your references to, choose "New group"
...
- A box will come up asking for the name of the group. Type in the name for your new group and
...
- click OK.
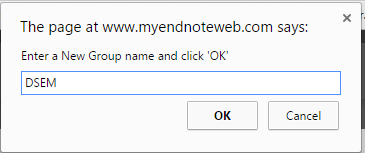
(Your instructor will tell you what to use for the group name. We used DSEM in this example. but you might need to use your last name or something similar.)
- There will now be a group by that name listed in the left-hand box in under My References:

- To add more items to the group, repeat the process from step 1: you will see that the group name is now in the list of groups you can add the item to:

Once
You can also add your items to a "Quick List" in order to group them temporarily for a bibliography or export.
You can add items to more than one group; the only exception is 'Unfiled'-- once an item is added to a group, it will no longer appear in the Unfiled group.
...
Sharing The Group with your Instructor
You can share groups of citations with other people who are using EndnoteWeb, so that they can add citations to your group, or merely see what citations you have chosen.
To share citations, log in to EndnoteWeb, make sure your citations are together in a group, then:
- Click on Go to the Organize tab.Choose Choose "Manage My Groups".

- Next to the group you want to share, click the Share checkbox:

- Now, click Click the Manage Sharing button.

- In the Manage Sharing window, click Start Sharing This Group

- Enter the email addresses of the people you want to share with.address of your professor

- Choose "Read Only" (if you only want them to see your citations) or Read & Write (if you want them to be able to add citations to your group)
- Click the Apply button.
- Click Close Window.