You can easily email one or more references from your EndnoteBasicEndnote online/EndnoteWeb account.
Making a
...
Group
If you already have those references in a named group, you can skip this step.
- Use the Quick Search box on the left to Search for each of the references you want to send.
- Click on the check box next to the reference
- Click the "Copy to Quicklist" button.
- Repeat for other references.
Searching Your References
Once you've added your references to your MyEndnoteWeb account, they will form a searchable database.
To find a particular reference,
Go into the My References tab 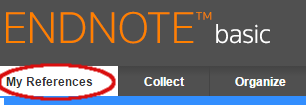
Type the term you wish to search for in the box under "Quick Search", then click the search button: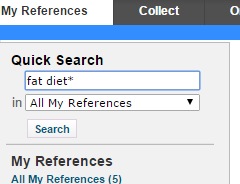
Note that if you use multiple words in the search box, Quick Search will simply display all the records with ANY of your search terms. To search for a specific phrase, enclose the phrase in quotation marks. Boolean searching (with AND, OR, NOT etc.) is not supported but you can truncate terms of 3 or more characters with an asterisk: diet* for diet, diets, dietary, dietetic, etc..
The search results will appear in the right column.
Putting your References Into Group
To share your results with your instructor, or to print them, using Endnote Basic, you'll have to define them as a named group. To do this,
- In either a search or a folder (such as "Unfiled") select the references you want to group by clicking the checkboxes next to them.

- At the top of your list of references you'll see a drop-down menu that says "Add to Group." To create a new group to add your references to, choose "New group"
- A box will come up asking for the name of the group. Type in the name for your new group and click OK.
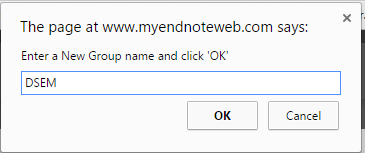
(Your instructor will tell you what to use for the group name. We used DSEM in this example. but you might need to use your last name or something similar.) - There will now be a group by that name listed in the left-hand box in under My References:

- To add more items to the group, repeat the process from step 1: you will see that the group name is now in the list of groups you can add the item to:

Once an item is added to a group, it will no longer appear in the Unfiled group.
Formatting the Bibliography/List of References
...
- Click on the Format tab and choose Bibliography.

- In the References drop down menu, choose the group name you gave your references, (or choose Quicklist if you copied your references to a quicklist).
- In the next line, you need to choose the Bibliography Style.
- If you haven't already done so, click on Select Favorites to choose which styles you'll use.

- In the All column, find and select the style(s) you want to use-- for Drew Seminar, use Drew Longman's.

- Then click the Copy to Favorites button.
- The style will come up in the My Favorites list.

- Repeat for each style you want. (MLA No-Print, APA 6th, Chicago 16th are all popular additional choices)
- Click on Hide in the upper right corner of the box to close it:

- In the All column, find and select the style(s) you want to use-- for Drew Seminar, use Drew Longman's.
- From the Bibliographic Style line, choose the style you want. Drew Seminar should choose Drew Longman's.

- If you haven't already done so, click on Select Favorites to choose which styles you'll use.
- Finally, choose the format you want to send your bibliography in. We suggest HTML.

- You can test to see whether the bibliography looks the way you want by choosing Preview and Print (you may need to change your pop-up blocker settings to allow endnoteweb.com).
- To send the bibliography to your instructor, click the E-Mail Button.

- In the window that pops up, enter your professor's email address in the To line.
Be sure to include some identifying information (whatever your professor has asked for) in the Subject and Message lines.
- Click the Send button.
- You should get a message saying References have been successfully sent in an e-mail to "professor'semail@drew.edu".
- You can click the Close Window link to close the window.