| Info |
|---|
PLEASE NOTE: This documentation is in the process of being updated. Please ignore our appearance as we make improvements! |
| Excerpt |
|---|
The Citrix Receiver Workspace app is the local client that runs Citrix-hosted applications. It replaces the Citrix Receiver client. | Note |
|---|
| As of January 15, 2016, the Citrix ICA Plugin has been tested in the following browsers: Tested browsers include: PC: Firefox, IE, Opera, Chrome Mac: Firefox, Safari, Chrome | If you have trouble using Chrome one browser to launch Citrix Applicationsapplications, please try using a different browser. |
Step-by-step guide (for PC)| Expand |
|---|
| Section |
|---|
| Column |
|---|
| | Info |
|---|
| title | Citrix Receiver for Web Plugin |
|---|
| Citrix Storefront (the website where apps are listed) uses a browser plugin to detect the Citrix software. The below screenshots are of Firefox, but all browsers listed above will need to allow/unblock this plugin. This is the same for all of our web app installations. If any of the screens below don't appear, check for a blocked plugin in the browser address bar. |
- Go to https://cloudpc.drew.edu/. You will be prompted to log in to your Drew account if you are not already signed in.
- The first time you navigate to https://cloudpc.drew.edu/, you will be taken to an informational page in U-KNOW. Choose "Proceed to CloudPC" link.
- You will be prompted to install the Citrix Receiver. Click the checkbox to agree with the license agreement (after you read the agreement). Click Install.
 Image Removed Image Removed - After the installer downloads, you may be prompted to Save or Run the file. You will see examples below of Firefox prompts (Save File, then click on it in the Downloads drop down) and Internet Explorer prompts (Run, then Yes).
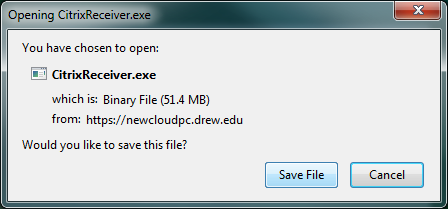 Image Removed Image Removed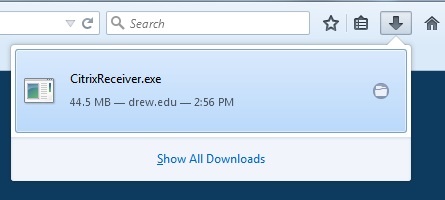 Image Removed Image Removed
 Image Removed Image Removed - Click Start. Review and accept the license agreement.
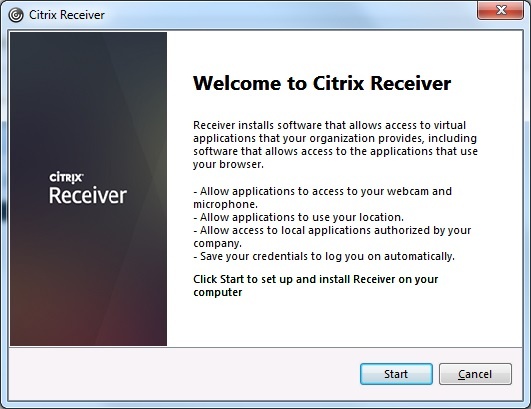 Image Removed Image Removed - Do not enable single sign-on.
- We recommend changing the option for sending usage data to Citrix to "No".
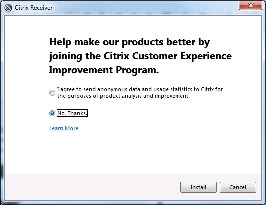 Image Removed Image Removed - Click Install.
- At the end of the installation, you will get the "Installed Successfully!" message. Choose Finish.
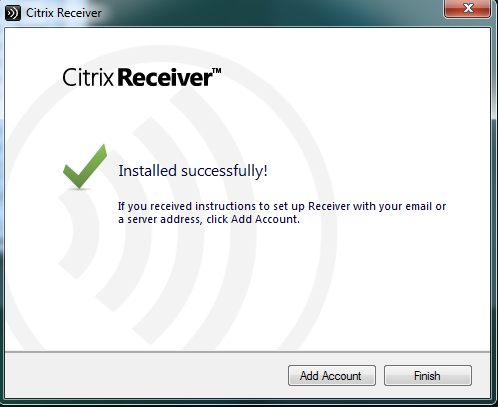 Image Removed Image Removed - After the installation completes, the Citrix site will detect Citrix Receiver and prompt you to Allow the "Citrix ICA Client" plugin. In IE, choose "Allow." In Firefox, choose "Allow," then "Allow and Remember."
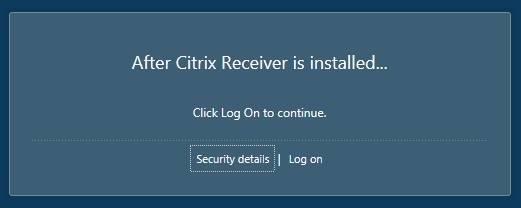 Image Removed Image Removed 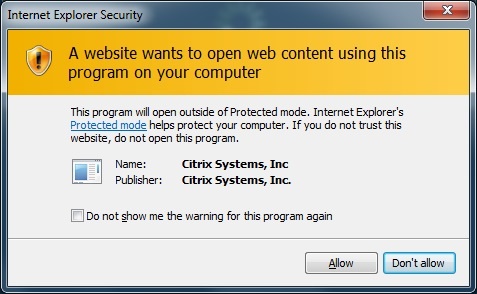 Image Removed Image Removed
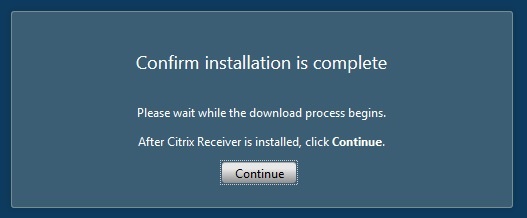 Image Removed Image Removed 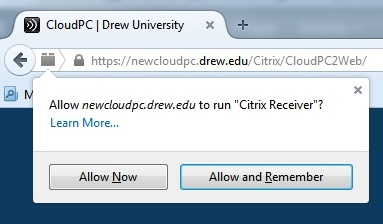 Image Removed Image Removed - You will then be sent to your Citrix Receiver for Web CloudPC Desktop. This is where you can customize your available applications. To add an application, follow the arrow and click on the + sign on the left.
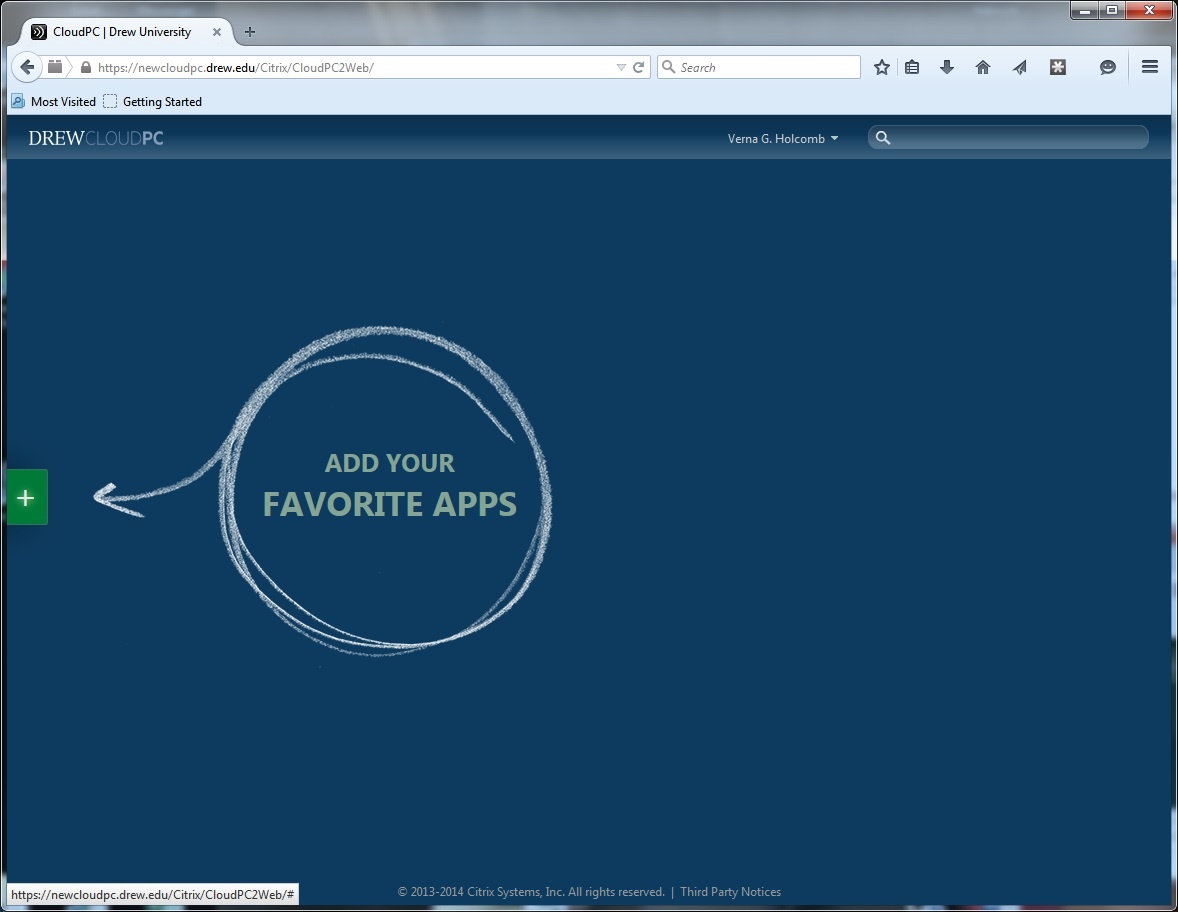 Image Removed Image Removed - The applications are sorted into categories. These categories are similar to the folders in the previous CloudPC system.
If you wish, you can also use the Search bar in the upper right of the CloudPC Desktop.
 Image Removed Image Removed
Please note: Your list of available applications depends on your role(s) at Drew.
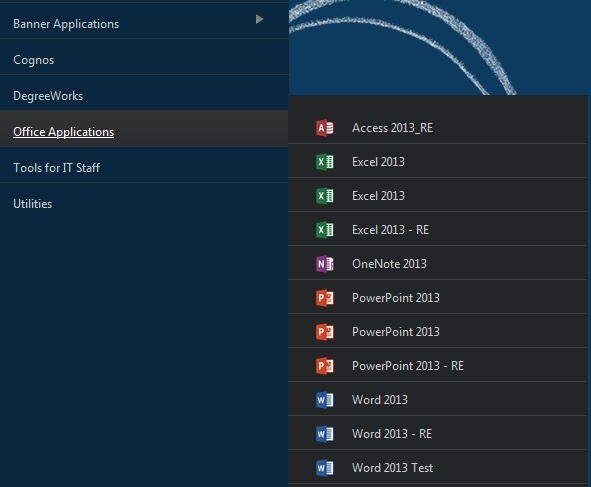 Image Removed Image Removed - Clicking the application name in either the Applications Menu or the Search will add it to your CloudPC Desktop. Single-click an application to launch.
 Image Removed Image Removed
|
| Column |
|---|
|
|
In Chrome, please follow these steps.
Go to https://cloudpc.drew.edu/. You will be prompted to log in to your Drew account if you are not already signed in.The first time you navigate to https://cloudpc.drew.edu/, you will be taken to an informational page in U-KNOW. Choose "Proceed to CloudPC" link.You will be welcomed to Receiver. Click Install.
 Image RemovedChrome will check to see if the Receiver is already installed. As directed, choose to Launch application if a window pops up and skip to step 13*. If you have not installed the Citrix Receiver, click the checkbox to agree with the license agreement (after you read the agreement). Then click Download.
*If you have already installed the Citrix Receiver and are not getting the pop up window, proceed to step 12.
 Image Removed
Click the downloaded file. Select Yes to confirm running the program.
 Image Removed
Click Start. Review and accept the license agreement.
Image RemovedDo not enable single sign-on.We recommend changing the option for sending usage data to Citrix to "No".
Image RemovedClick Install.At the end of the installation, you will get the "Installed Successfully!" message. Choose Finish.
Image Removed Return to the browser and click Continue.
 Image RemovedCitrix will check to see if the Receiver was installed. If the window with the "Launch Application" option does not appear, select "Already installed."
 Image RemovedYou will then be sent to your Citrix Receiver for Web CloudPC Desktop. This is where you can customize your available applications. To add an application, follow the arrow and click on the + sign on the left.
Image RemovedThe applications are sorted into categories. These categories are similar to the folders in the previous CloudPC system.
If you wish, you can also use the Search bar in the upper right of the CloudPC Desktop.
Image Removed
Please note: Your list of available applications depends on your role(s) at Drew.
Image RemovedClicking the application name in either the Applications Menu or the Search will add it to your CloudPC Desktop. Single-click an application to launch.
Image Removed
| Expand |
|---|
| Info |
|---|
| title | Citrix Receiver for Web Plugin |
|---|
|
Citrix Storefront (the website where apps are listed) uses a browser plugin to detect the Citrix software. The below screenshots are of Firefox, but all browsers listed above will need to allow/unblock this plugin. This is the same for all of our web app installations. If any of the screens below don't appear, check for a blocked plugin in the browser address bar. |
Go to https://cloudpc.drew.edu/The first time you navigate to https://cloudpc.drew.edu/, you will be taken to an informational page in U-KNOW. Choose "Proceed to CloudPC" link.You will be prompted to install the Citrix Receiver. Click the checkbox to agree with the license agreement (after you read the agreement).
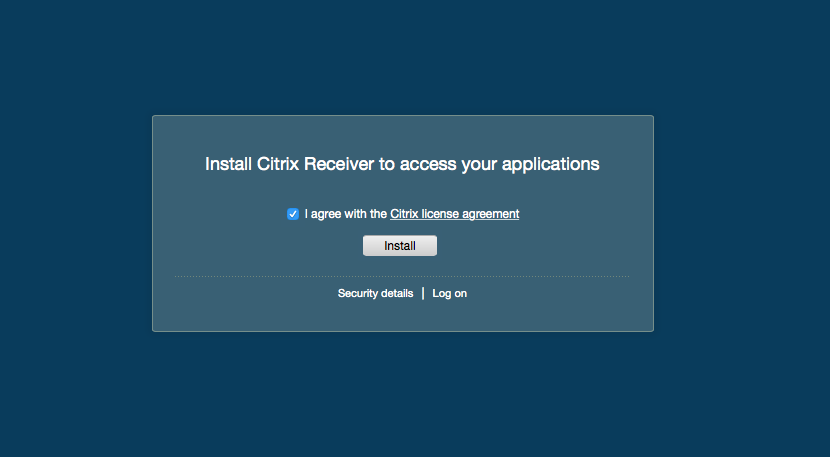 Image RemovedAfter the installer downloads, you may be prompted to Save or Run the file. Run the installer by clicking in the top right corner and selecting the CitrixReceiver.dmg file from your downloads.
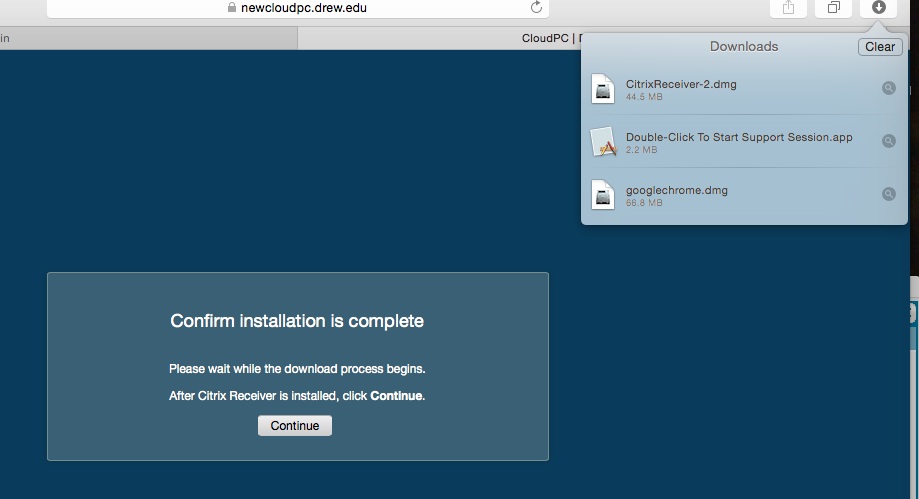 Image RemovedOpen the CitrixReceiver.dmg file you have downloaded and double click on the Install Citrix Receiver application to run the installer.
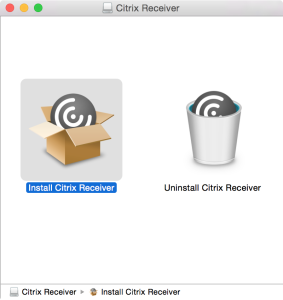 Image RemovedPlease click Continue to allow the installation to proceed through each of the steps of the installation.
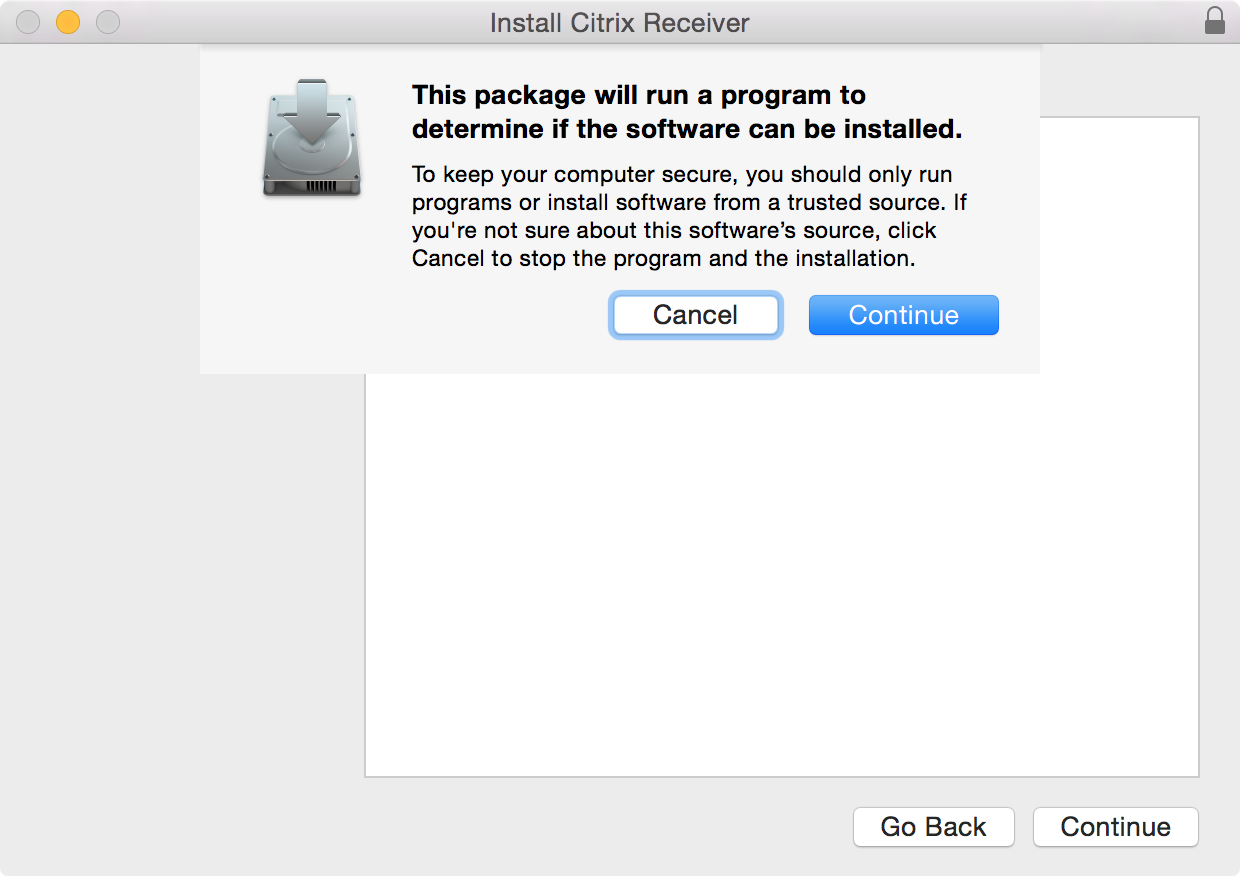 Image Removed
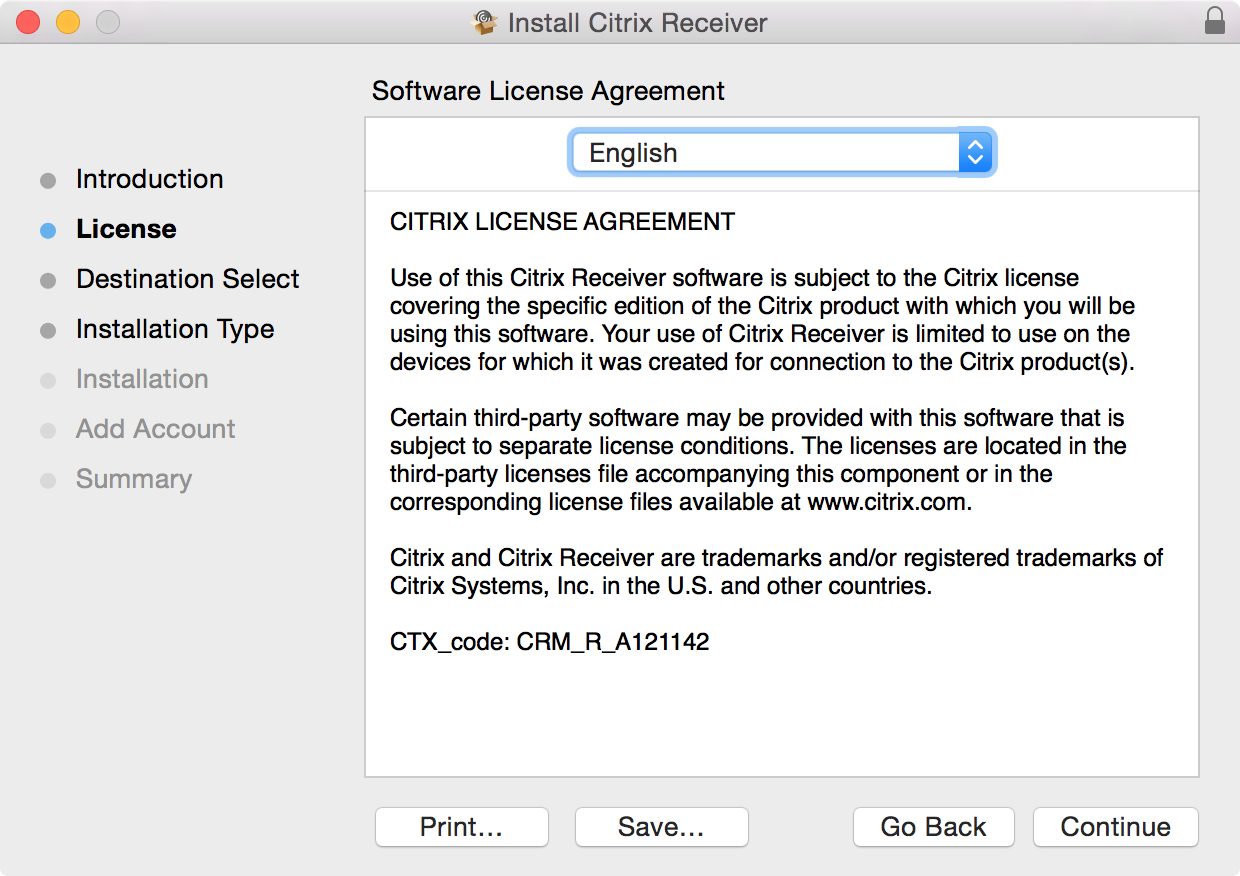 Image RemovedClick Continue without checking the box when prompted "If you received instructions to set up Receiver with your email or server address, check Add Account, then click Continue."
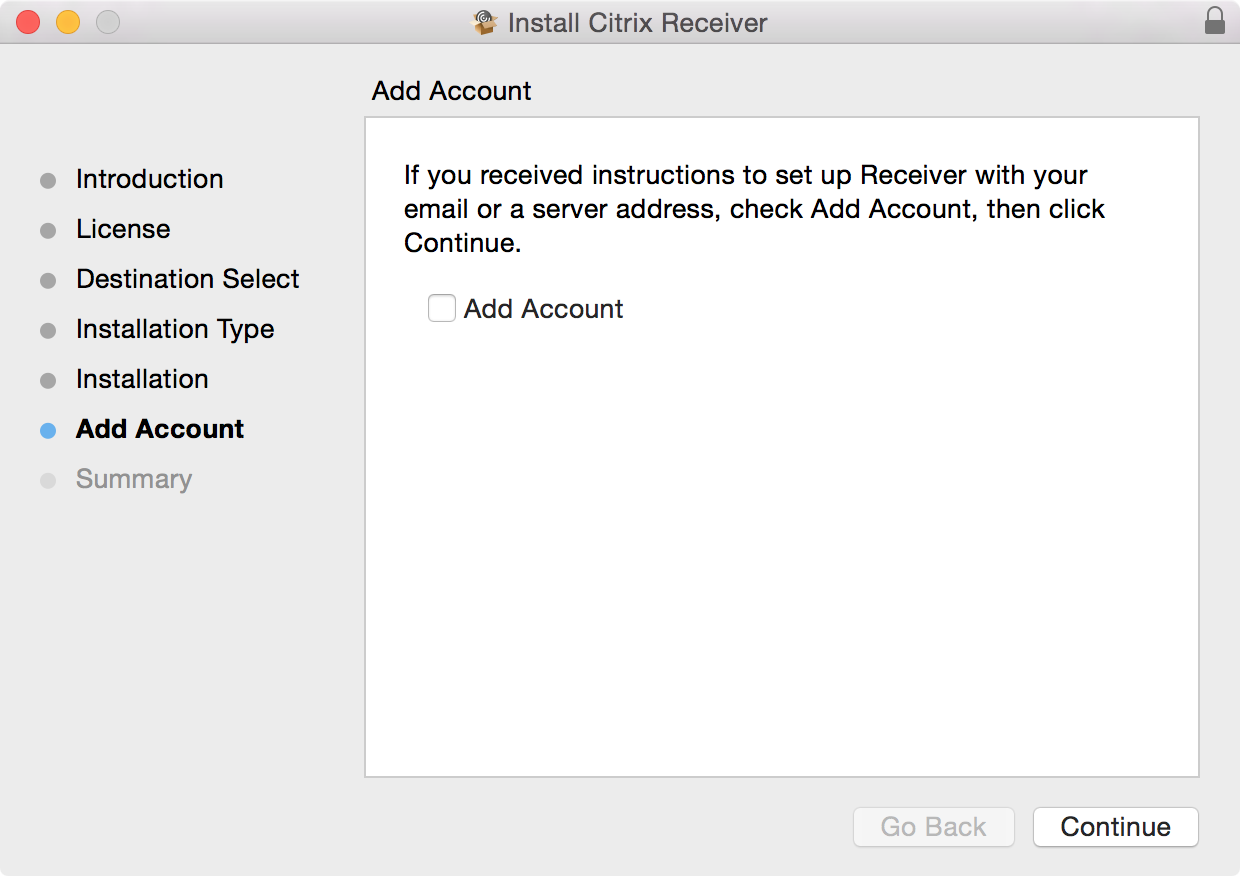 Image RemovedAt the end of the installation, you will get the "Installed Successfully!" message. Choose Finish.After the installation completes, return to your browser (you do not need to open the installed program).
Image Removed Image RemovedThe Citrix site will now detect Citrix Receiver and prompt you to Allow the "Citrix ICA Client" plugin. In Safari, choose "Trust." In Firefox, choose "Activate Citrix Receiver," then "Allow and Remember."
Safari: 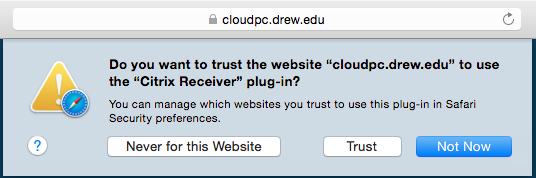 Image Removed
Firefox:  Image Removed
 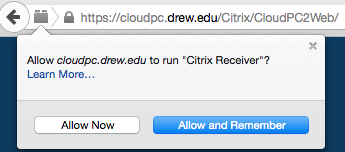 Image Removed
You will then be sent to your Citrix Receiver for Web CloudPC Desktop. This is where you can customize your available applications. To add an application, follow the arrow and click on the + sign on the left.
 Image RemovedNavigate to the section containing your application-these are similar to the folders in the previous CloudPC system.
If you wish, you can also use the Search bar in the upper right of the CloudPC Desktop.
Image Removed
Image RemovedClicking the application name in either the Applications Menu or the Search will add it to your CloudPC Desktop. Single-click an application to launch.
Image RemovedTo install the Citrix Workspace App, first download the latest version for your computer.
Windows: Software Center or https://www.citrix.com/downloads/workspace-app/workspace-app-for-windows-long-term-service-release/workspace-app-for-windows-LTSR-Latest.html
Mac: https://www.citrix.com/downloads/workspace-app/mac/workspace-app-for-mac-latest.html
Note for Mac users: if your Mac has an Apple Silicon chip (i.e. M1, M2, M3), download the installer for Apple silicon Macs. The other installer will not recognize an internet connection if installed.
- Launch the install file and approve installation. Do not enable single sign-on or app protection if asked. Do not check/click Add Account if prompted during installation.
- After successfully installing, launch Citrix Workspace.
- Enter your Drew email address and click Continue.
- Enter your Drew username and password and click Sign In.
- If you are enrolled in Duo Security, type in the method you usually use (such as push1 for a Duo push or phone1 to get a call on your main phone). Approve the Duo log in.
Using CloudPC
Now that you are set up, take a look at Using CloudPC for more information.
Related articles
| Content by Label |
|---|
| showLabels | false |
|---|
| max | 5 |
|---|
| spaces | techdocs |
|---|
| showSpace | false |
|---|
| sort | modified |
|---|
| showSpace | false |
|---|
| reverse | true |
|---|
| type | page |
|---|
| cql | label in ("citrix","receiver","cloudpc") and type = "page" and space = "techdocs" |
|---|
| labels | citrix receiver cloudpc |
|---|
|
Reviewed 5/31/23