Instructions for specific devices are below. You can click on the images to see them larger.
| Excerpt |
|---|
Google provides a broad range of options for connecting mobile devices to Google Apps. There are options for iOS devices (iPhone, iPad), Android phones and tablets, Windows Mobile devices, and Blackberry devices. University Technology will support iOS, Android, and Windows Mobile, and will offer best effort support for BlackBerry.
...
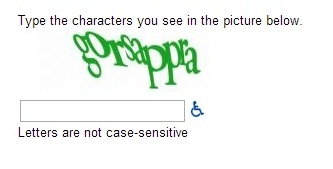
Before you beginThe Terms of Service for using Google Apps is only available on the web, so before you set the account up on a mobile device, you will need to access your Drew Google account on the web. You only need to do this once, so if you've already logged in to your Google Apps account, you do not need to repeat this step. 1. Sign into your Drew Google account on the web. The easiest way is to simply go to http://mail.drew.edu. 2. Be sure to accept the Google Terms of Service and complete the "CAPTCHA." |
...
3. Proceed to the instructions for your device. |
iOS (iPhone, iPad)
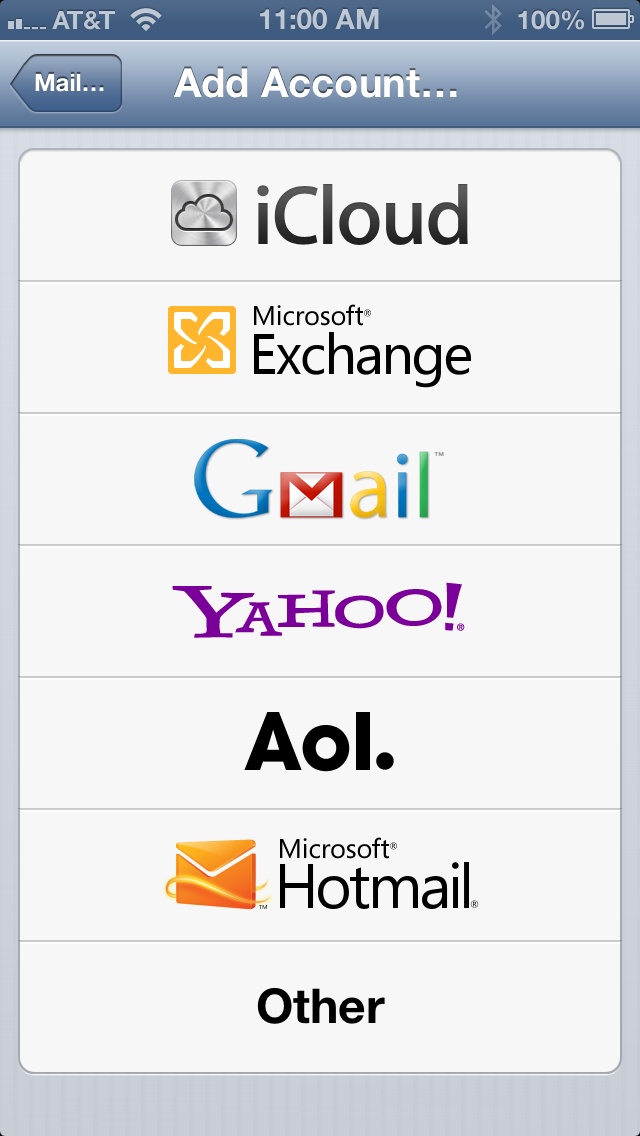
To configure your iPhone or iPad, please follow the instructions available at Google Support. Please note that you access Google similarly to how you used to access the Drew Mobility Server, by using the "Microsoft Exchange" server type on your phone. Do NOT use the "Gmail" option, it will not work fully and you will not get calendars and contacts on your device. Please also note that although Google has disabled this support for gmail.com accounts it remains available for Google Apps accounts.
...
| Expand | ||
|---|---|---|
| ||
Adding your Drew account as a Google accountSome people may notice that they won't have access to Drew's global contact list in older versions of iOS using this method (this means you will see auto-fill work for people you have emailed in the past, but possibly not for Drewids you've never emailed before).
|
|
...
|
...
|
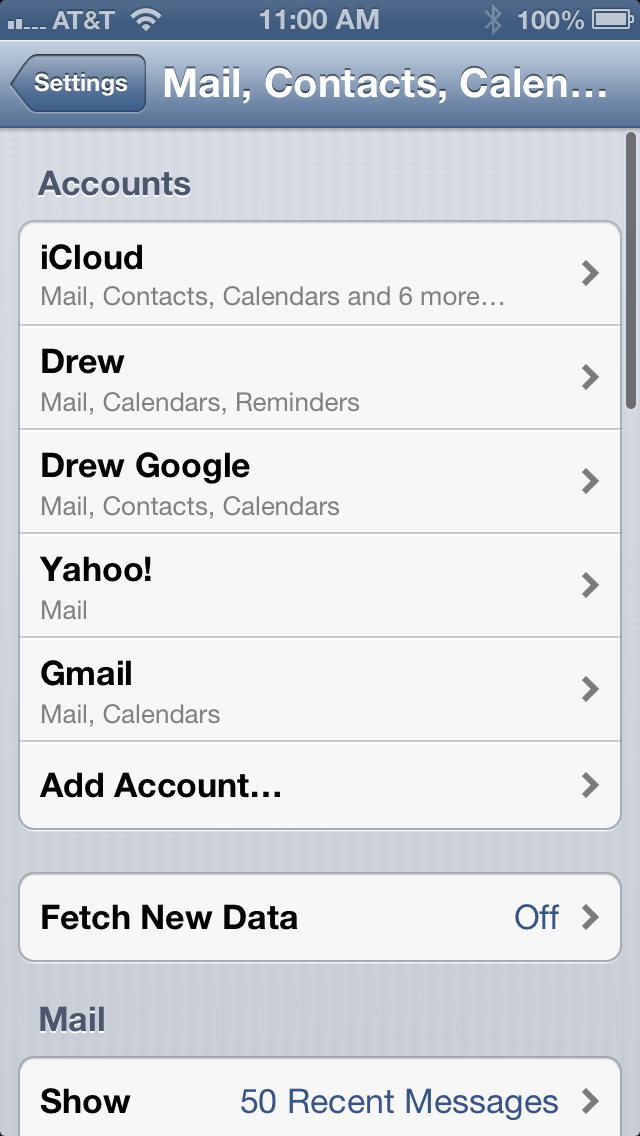
4. Select Microsoft Exchange Account
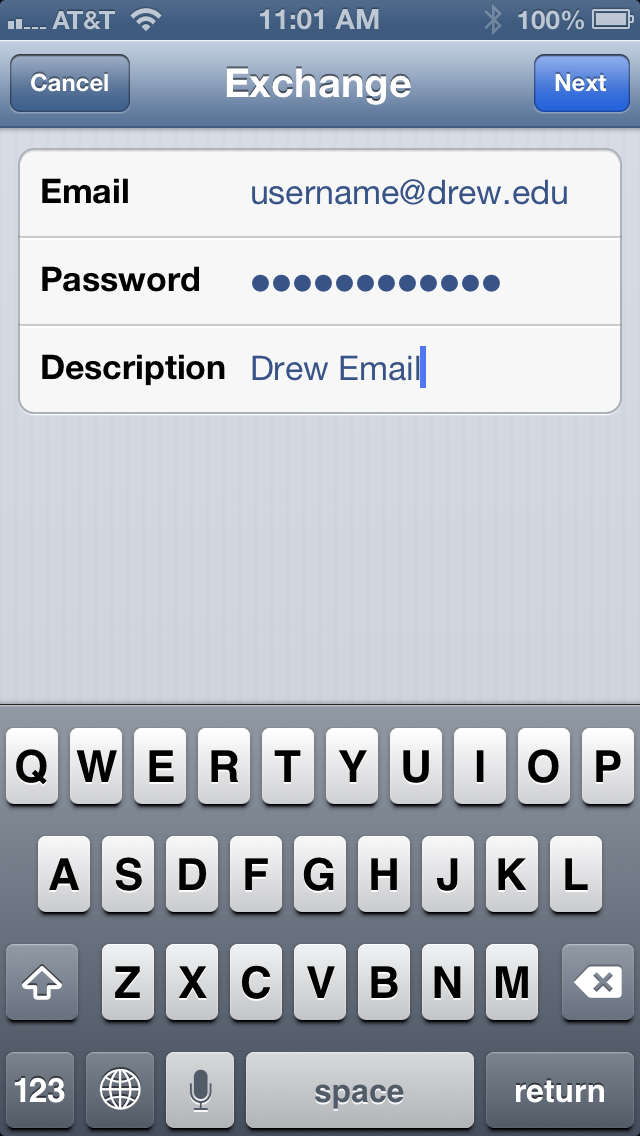
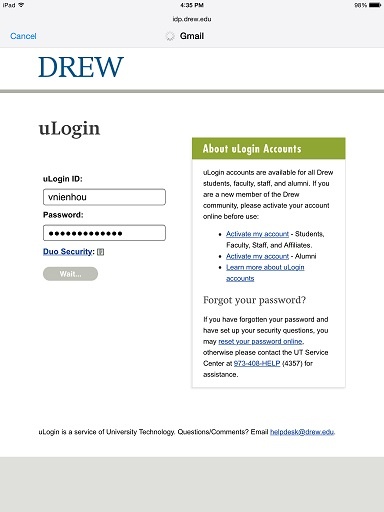
5. Enter your email address and uLogin password in the fields on the screen. Use an informative name for Description such as "Drew Email".
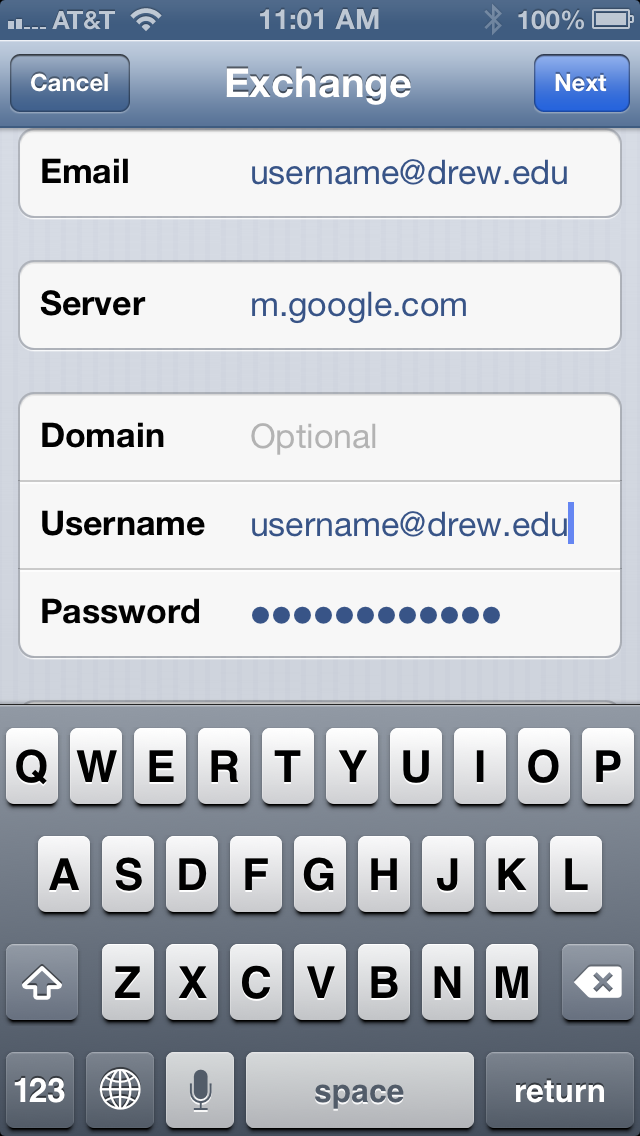
6. Please enter the the following information into the open fields.
Email= username@drew.edu
Server= m.google.com
Username= username@drew.edu
Password= Your Drew Password
When you are finished entering all the information please click on "next"
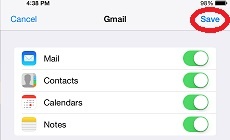
7. Make sure your Mail, Contacts and Calendars are all turned on. Then click "save".
If you successfully entered everything correctly then email should start filtering into your Drew Google account.
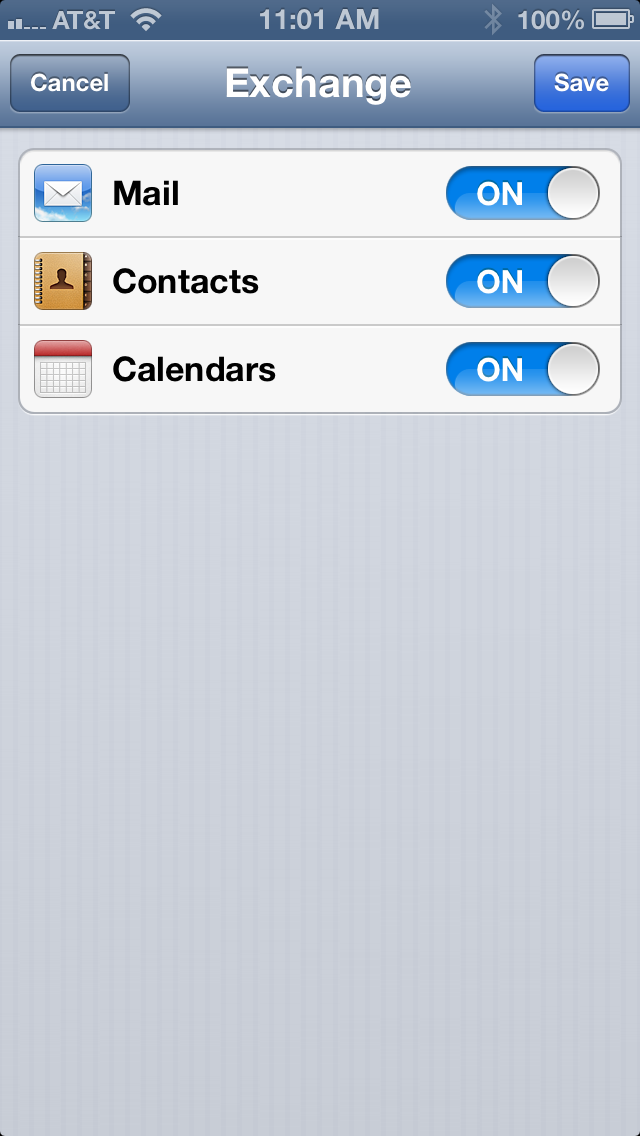
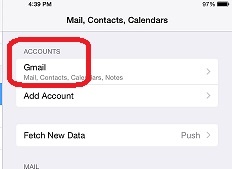
Note: "Push" is not supported with Google Mail viewed in the native iPhone Mail app, which means your phone may not routinely check for email messages. To check how your phone is set up, go to Settings > Mail > Accounts > Fetch New Data. Make sure your Drew account is set to "Fetch" and scroll down to set how often you would like your phone to check for new emails. If your Drew account is set up as an Exchange accountPlease delete the account and scroll up to follow the proper directions. |
Android
...
(most Samsung, HTC, LG, Motorola smartphones, Android tablets)
...
| Expand | ||
|---|---|---|
| ||
Android phones have native support for Google Services built in. To configure your Android device, first follow Google's instructions for the Device Policy. Then you can sign in to your Drew Google account following these instructions. You can have multiple Google accounts on your phone and it will show contacts and calendars for all of them (calendars from different accounts have different colors by default). Most other Google apps on the device allow you to switch which account is active or switch between accounts interactively. The newest Android phones will also require you to set up a work profile. Different Android phones from different vendors will look different. Read the procedure for an Android phone (v 5.0 and later) by clicking on the expand link below:
|
| Wiki Markup |
|---|
Android phones have native support for Google Services built in. To configure your Android device follow the instructions at [Google Support|http://support.google.com/a/users/bin/answer.py?hl=en&answer=1738362]. You can have multiple Google accounts on your phone and it will show both sets contacts and calendars (calendars from different accounts have different colors by default). *{_}Most \[googleapps:do we need to be more specific here? \] _{*}Google apps on the device allow you to switch which account is active or switch between accounts interactively. |
While different Android phones from different vendors may look slightly different, here's the procedure for an Android 4.2 phone:
...
|
...
|
...
|
...
|
...
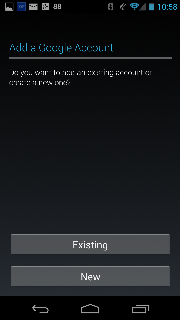
4. Select "Existing".
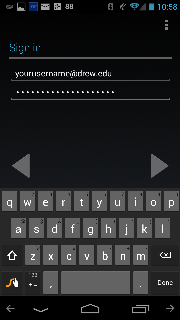
5. Enter your Drew email address and your uLogin password:
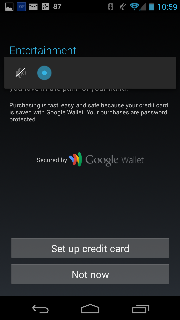
6. You may receive a screen offering to configure Google Play Store, you can select "Not now" here.
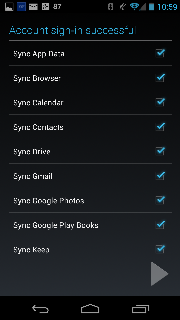
7. Your phone will work for a moment, and if successful will show that information is configured to sync to your phone.
Windows Phone:
...
|
Android Device Policy
| Expand |
|---|
Faculty/staff users: Under our policy on the responsible handling of University data, Android users who connect their Drew account to their device are required to install and configure the Android Device Policy app for their device. This will allow Drew to lock or wipe the device in the event that it is lost or stolen, and will allow Drew to protect sensitive University data that might be available in Gmail, Drive, or stored on the device. You will be prompted to install the app when adding your Drew email to your phone. In the event your device is lost or stolen, you can go to https://www.google.com/apps/mydevices/ to locate the device on a map, activate an alarm, remotely lock the device, or remotely wipe it. University Technology can also wipe the device remotely if desired. |
Reviewed April 9, 2024